The Art of Drying: Preservation for the Long Winter
Overview
On the Great Plains, where the seasons are defined by extremes, the ability to preserve the abundance of summer for the scarcity of winter was the thin line between prosperity and starvation. Of all the preservation technologies developed by Plains Native nations, drying was the most universal and essential.
By removing moisture, indigenous harvesters halted the processes of decay and concentrated both the nutritional and medicinal potency of their plants. In this exploration, we examine the physics, the methods, and the cultural practices of traditional plant drying.
The Physics of Preservation
The Great Plains provide a perfect environment for air-drying: low humidity and constant wind. Traditional drying wasn’t just about heat; it was about airflow. By increasing the surface area exposed to the dry prairie air, moisture was rapidly wicked away, preventing the growth of molds and bacteria.
Primary Methods
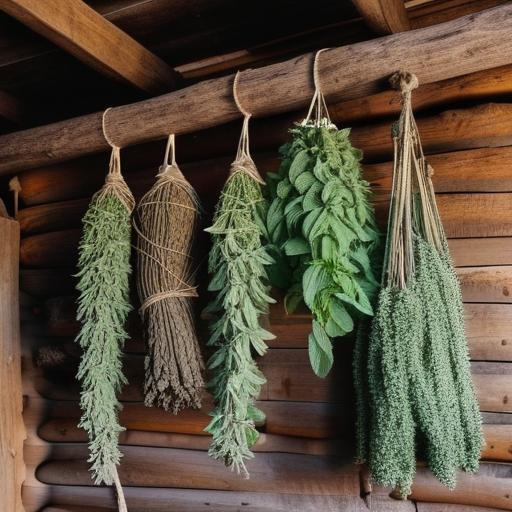
1. Braiding and Hanging
This was the primary method for root crops and certain large-leafed herbs.
- The Prairie Turnip (Timpsila): Once peeled, the long, thin taproot ends were braided together into strings up to six feet long. These braids were then hung outside the lodge or from specialized drying racks.
- Bundling: Medicinal herbs like sage (Salvia spp.) or sweetgrass (Hierochloe odorata) were tied into small, loose bundles and hung upside down. This caused the aromatic oils to concentrate in the leaves rather than the stems.
2. Pounding and Cake-Molding
For fruits and berries that are too moist to dry individually, pounding was the solution.
- Chokecherries: As discussed in our Berries article, chokecherries were pounded whole. The resulting paste was molded into flat, thin cakes. The thinness of the cake allowed it to dry completely through to the center, creating a shelf-stable “leather.”
3. Mat Drying
Large, flat mats made of woven reeds or willow were used for small items like seeds, individual leaves, or sliced roots.
- Direct Sun vs. Shade: While many food plants were dried in the direct sun to accelerate the process, most medicinal plants were dried in the shade (often inside the lodge or under a specialized arbor). Direct UV light can degrade the sensitive chemical compounds in many medicinal species.
The Signs of Completion
Determining when a plant is “dry” is a matter of sensory experience.
- The Snap Test: A properly dried root or stem should “snap” cleanly when bent. If it merely bends (is “leathery”), moisture remains.
- The Color Shift: Most plants shift in color toward muted greens, silvers, or ambers. A blackening of the tissue usually indicated that the drying was too slow and fermentation or rot had begun.
Storage After Drying
Drying is only half the battle. Once dry, plants must be kept in a low-humidity environment. Traditionally, this was achieved through the use of parfleche bags—containers made of stiff, processed rawhide. These bags were somewhat breathable but thick enough to protect the contents from pests and sudden shifts in humidity.
Conclusion
The art of drying represents a profound partnership with the environment. It used the sun and the wind—two of the plains’ most abundant resources—to create a system of food and medicine security that lasted for generations. Today, these methods remain the gold standard for high-quality botanical preservation.
Next in our Preparation Series: Infusions and Decoctions: Extracting the Spirit of the Plant.